Cropping images in an Action
This feature is only available to FotoWeb Pro licensed users, and only in the FotoWeb Pro user interface
When running an action that has the crop feature enabled you will be presented with the a crop window that allows you to apply a crop frame and size the image before proceeding. If several pictures are processed in the action, you can crop the images one by one.
Cropping and sizing
Set the crop by dragging a frame around the area you'd like to keep. You can also rotate the crop by placing the cursor outside the crop frame and dragging.
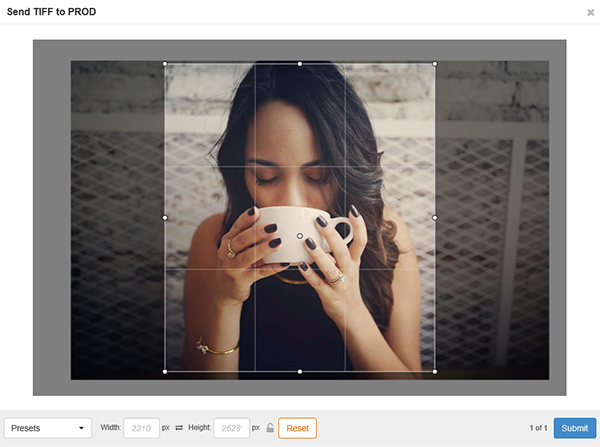
Then specify a pixel size by setting width and/or height. You can set either and let the other be determined by the crop, or you can lock the aspect by setting both width and height.
If you specify both locking both width and height, a crop frame will be applied that matches the proportions, and you can size and place it afterwards to match the area you'd like to keep.
If the chosen processing profile has been configured to resample the picture to a certain pixel size, the height and width values are used to designate an aspect, not the actual pixel size, since the final pixel size is determined by the processing profile.
Clicking on Reset crop resets the crop frame.
Tip: Rotate the crop frame by clicking outside it and dragging.
Resetting the crop
To reset the crop, click on the Reset button. If you've locked either width or height, those measurements will remain. To completely revert the crop window to the outset, resetting all settings, open the Presets menu and choose Revert.
Submitting the image
When you've set the crop and size, click on Submit. If there are more images in the queue, the crop window will display the next image in the queue.
Creating a crop preset
All users can create crop presets that store their preferred processing profile, chosen crop and image dimensions. That way, it's easy to apply the same settings at a later time.
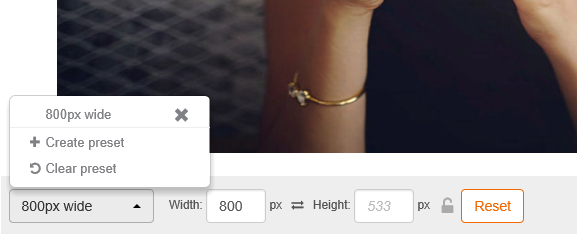
Having set your preferred crop and size, click on the Presets button and choose Create preset. Then name the preset and click OK.
The new preset is then stored and available in the Presets menu for another time.
Important to note:
Crop presets for the Crop and Download feature are separate from the presets used for Crop in workflows.
Clearing a selected crop preset
To clear all settings in the crop window and revert to the outset, open the Presets menu and choose Revert.
Sharing a crop preset
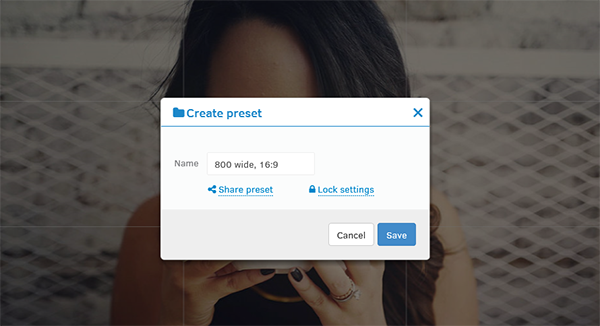
A user can share a preset when saving it by enabling the Shared option in the Save dialog.
Shared presets are made available to all other users with access to the crop and download feature.
If you choose the Lock settings option when sharing a preset, anyone who uses the preset can only change the crop frame and rotation, but may not change the selected processing profile and pixel size or aspect.
When the settings aren't locked, the user can override the choice of processing profile and pixel/aspect ratio.
Controlling who can share presets
For users to be able to share presets with others, the group permission Share crop presets must be set on one of the groups that the user belongs to.
Existing shared presets can only be deleted by users who have the group permission Share crop presets assigned.