Printing pictures
Learn how FotoStation can print your pictures in different sizes and layouts.
Printing pictures
Before you open the Print window, select one or more images that you would like to print. Note that the order in which you select the images will be reflected when you print them. Select Print in the toolbar to open the Print window, or use the print shortcut (Ctrl+P / Command–P).
Before you select OK to start printing, there are some options you can set:
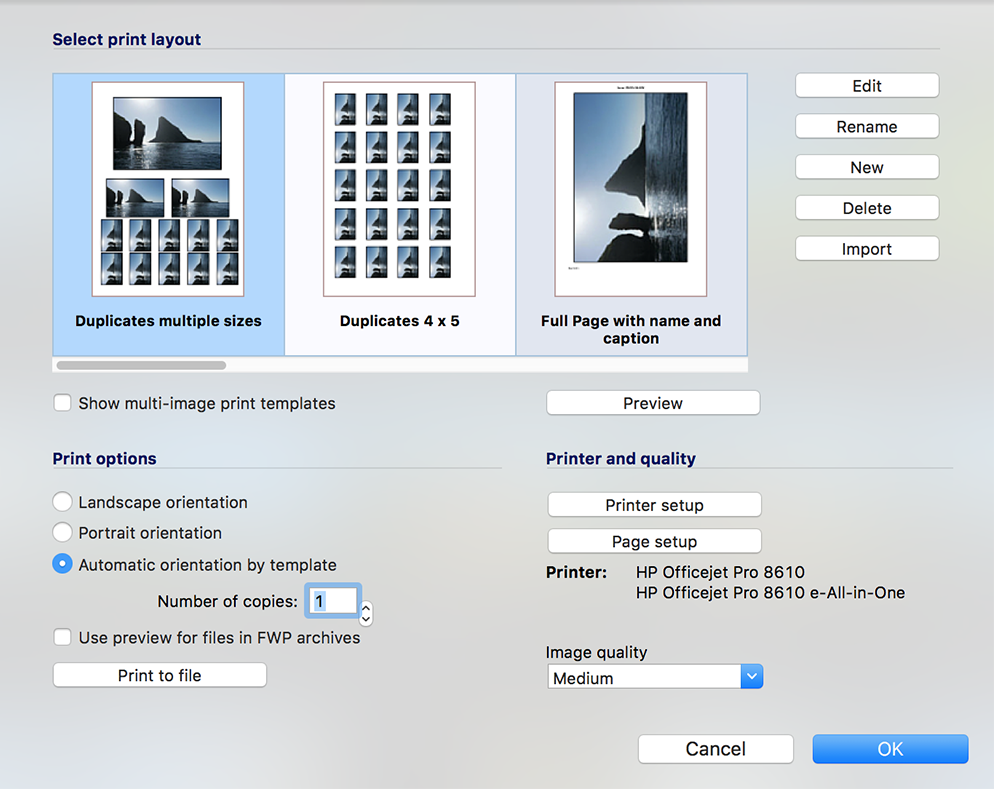
Choosing a print template
Select a print template by clicking on one of the page thumbnails shown in the Print window. Drag the scroll bar underneath the template thumbnails to see all available.
If you selected only one image before you opened the Print window, you will only be able to see templates designed for printing a single image. (Note that even if the templates are designed for a single image, several of the templates are designed to print duplicates of the selected image.) If you would also like to choose from the templates for printing multiple images, select the Show multi image print templates option.
Previewing the print
Click on the Preview button to see what the output of what the page will look like when printed. You will only get a preview of the first page.
Setting print options
Choose the printed document’s orientation (Landscape or Portrait). If you select Automatic orientation by template the orientation will be determined by the default settings in the selected template.
Clicking the Printer setup button opens the system’s standard print setup window. In this window, you will normally be able to adjust typical print settings such as choice of printer, number of copies, etc.
Choosing resolution and image quality
In Windows, the Resolution value listed refers to the printer’s resolution as set in the printer driver. The Image quality dropdown list, however, is the resolution that FotoStation will send to the printer. You can choose between several quality levels, where High, Medium, and Low quality correspond to 300 dpi, 200 dpi, and 100 dpi respectively. Note that you can also enter a quality value directly into the Image Quality field. The Automatic option is used to optimize the Image Quality according to the printer’s resolution.
For some print templates, the resolution is predefined. When one of these templates is selected, you can’t change the resolution, and the text Image quality is set in template will appear in the Image Quality list.
Printing the preview rather than the high-resolution image
When printing the high-resolution image from a remote archive via FWP, the image has to be downloaded to the client, which can take some time if you're printing a large selection of images. In this case you can choose to print only the lower-resolution preview. To do so, tick the option Use preview for files in FWP archives.
Printing the image or images
When you have selected the print settings that you prefer, click on the OK button to print the image or images.
Printing non-image files
FotoStation can only print files that display a thumbnail and a preview in FotoStation. If the thumbnail view in FotoStation doesn’t display a thumbnail, you can’t print the file.
Printing to a file
Sometimes you may not want to send the selected images to a printer right away, but rather save the selected template and images in a file for later use.
To save the files, click on the Print to file button. Enter a name for the file into the File name field. The file name entered into this field is used as a basis when creating the files. Then select a file format from the dropdown list. You can choose between EPS, JPEG, and TIFF as file format on the output file(s). For each file format, you can view and edit specific options for that format by clicking on the Options button. You are also given the option to embed an ICC profile in the output file.
Choose where you would like to save the file. If you want to save it in a specific folder, select the Save to a folder option. You can either enter the path directly into the text field or browse your computer. If you want to save the file(s) directly in an archive, select the Save to an archive option. All archives will be shown in the dropdown list.
Set the desired Pixel Width and Pixel Height together with the Resolution before you click on the OK button.
Using Actions to print files in an external application
By using actions, you can print files by launching the appropriate application corresponding to the file you would like to print.
Example: Printing Word files from FotoStation
This is what the Action properties window could look when creating an action for using Microsoft Word for printing Word documents. The path to the application is inserted into the Application to launch field, and the command line parameter for printing is inserted into the /mFilePrintDefault text in the Command line field. The command line required by an application to print the selection may be documented in that application's user guides or on the web.
The Add file names to command line checkbox must be selected.