Making screen captures
Overview
How to capture parts of the screen e.g. for a presentation using the Screen capture function in FotoStation.
About screen capture in FotoStation
The screen capture feature is a basic utility for capturing the content of the screen for use in, for example,. a presentation. This function is only available in FotoStation for Windows.
Using screen capture
To access the screen capture module, select Tools > Screen capture.
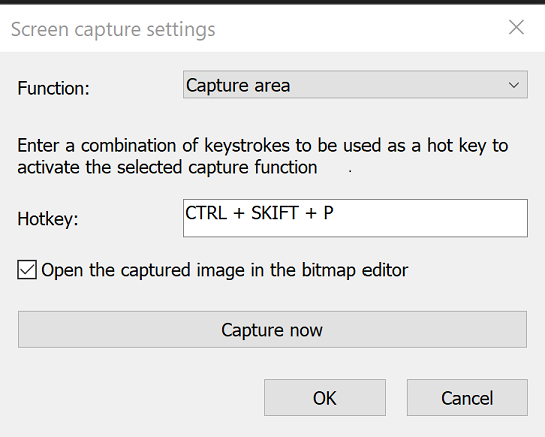
From the Function drop-down list, select can choose between Capture area (by clicking and dragging your mouse across it) or Capture active window.
Setting a hotkey
Use the Hotkey field to choose a keyboard combination for activating the screen capture function. Click in the Hotkey field and press a combination of keys on your keyboard. Make sure it does not interfere with hotkeys that your other applications may use.
If you would like to display the capture in the bitmap editor after capture, select Open the captured image in the bitmap editor. If this option is not selected, the captured area will be copied directly to the system clipboard.
Performing a capture
Select Capture now to make a capture right away or select OK to save your settings. The capture utility can then be activated at any time using the preset keyboard shortcut.
The Bitmap Editor
If you have configured the capture utility to open your capture in the editor after capture, you can make simple modifications to the capture. All functions available are accessed using the buttons on the bitmap editor’s toolbar.
Toolbar buttons
Save to file: You can save the captured graphics as a file. You can choose between JPEG, TIFF, and EPS formats. Choosing JPEG also lets you set a quality level.
Copy to clipboard: – Copies the captured graphics to the system clipboard for pasting into another application.
Print screenshot: Opens the system Print dialog so you can print your screen capture.
Select tool: – The select tool lets you select and move items that you have added to the captured graphics, such as rectangles, circles, and annotations. Selected items can be deleted by pressing the Delete key on the keyboard.
Ellipse, Rectangle, and Rounded rectangle button: You can add shapes to the graphics. Before drawing the shape, use Select active drawing color button to set the shape’s color.
Annotation: This arrow lets you make simple annotations. Start by selecting the arrow color by using the Drawing Color button. Then choose a font, font size, style, and color using the font controls in the toolbar. Type the text for the annotation in the Annotation Text box, then click and hold the mouse button where you want the arrow to point, and drag the arrow as far as you want it to go before releasing the mouse button.
Select active drawing color: Select a color for the shapes you add to the graphics.
Font controls: Select a font, color, size, and style for any annotations you add to the graphics.
Tear effect buttons: You can add a torn-off-the-page effect to either side or all sides of the graphics. The tear is random so that no two "torn" graphics look just the same.