Configuring image processing profiles
What are processing profiles?
Processing profiles are used by FotoWeb to apply image processing or third-party processing to files when a user requests a download or sends images to a workflow (action). They can also be used in the FotoWeb Desktop Extension for Adobe InDesign to process a file directly before placing it in the layout.
FotoWeb has built-in mechanisms for changing image file formats, image resizing, color conversion with ICC profiles, watermarking, and sharpening. In addition, processing profiles can be used to deliver files to a third-party system that can process them in any way before delivering them back to FotoWeb.
Note
- Most of the processing profiles functionality that is described below only applies to the processing of image file formats. FotoWeb processing profiles can store images in these output formats: TIF, TIF with JPEG compression, JPEG, EPS JPEG (with TIF preview), and PNG 8 bit.
- For non-image files, users can only apply processing profiles that have been configured for external processing. If a profile that involves external processing and image operations (color space, resizing, and so on) has been assigned to an archive and configured to be applied to all download operations, image processing will be skipped for the non-image files.
- When a processing profile set (a collection of processing profiles from which the user can choose) has been assigned to an archive, a user can only choose from those profiles that involve downloading the original asset or external processing when processing non-image formats.
Learn how to assign a processing profile that you have made to an archive.
Creating a processing profile
- From the Tools menu (cogwheel icon), go to Site Configuration > Workflows > Processing Profiles.
- Select Add processing profile.
- On the General tab, enter a name for the processing profile and, optionally, enter a description.
General settings

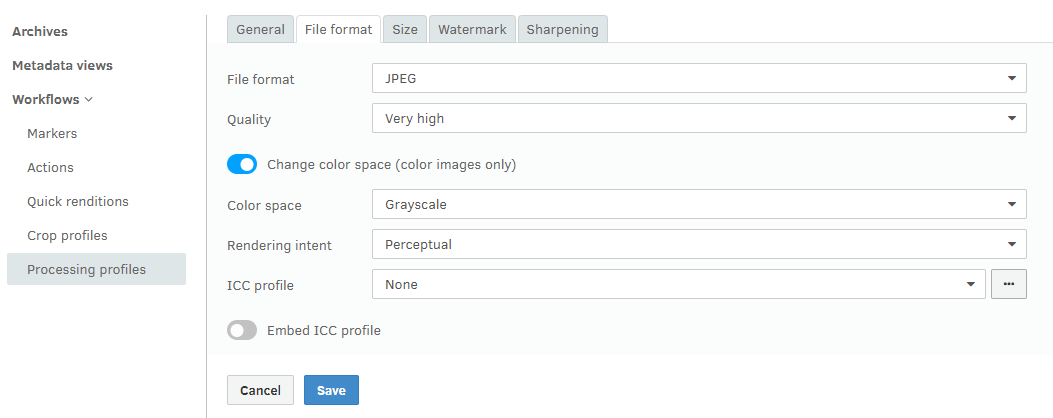
- Open the File format tab.
- Select the output format for the processed file from the File format drop-down list.
- To change the color space, select a value from the Color space drop-down list. You can also select values from the Rendering intent and ICC profile drop-down lists.
- Use the ... button next to the ICC profile field to select a profile or to upload a profile from the local computer to the server.
- If you select CMYK as the color space, you can turn on the Embed ICC profile toggle to embed the ICC profile in the output file (this toggle cannot be used with the other color space options). If the file has an embedded ICC profile before the processing, this profile will be used as the input profile.
File format and color space
- Open the Size tab.
- Here, you can set resizing options for the image. You can choose not to change the output size, resample the image, or stamp the file with a resolution or size without altering image data.
Image size

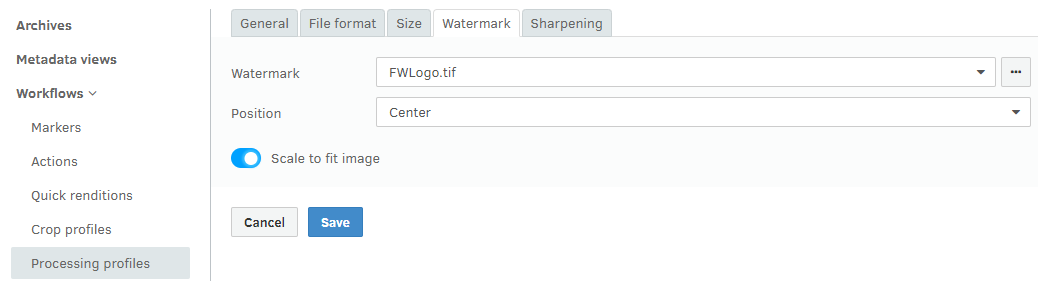
- Open the Watermarking tab to add a watermark to all files before they are delivered to the client.
- To add custom watermarks to the list, copy them to the Watermarks folder in the Server Settings folder.
Tip: When creating a watermark, you can achieve transparency by ensuring those areas have a color value of 128 in R, G, and B channels.
Watermarking
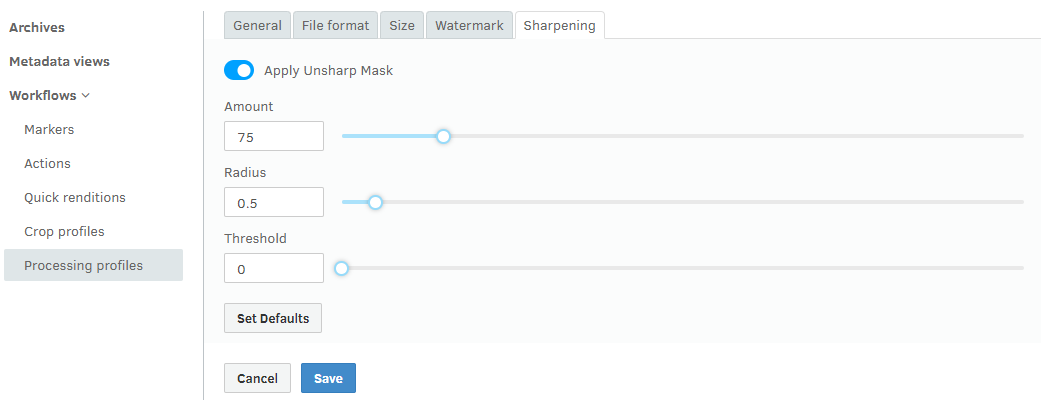
- Open the Sharpening tab.
- Turn on the Apply Unsharp Mask toggle to add an unsharp mask to the pictures.
- Adjust the Amount, Radius, and Threshold settings as required. If you are uncertain about the optimum values, try with the default settings first.
Sharpening
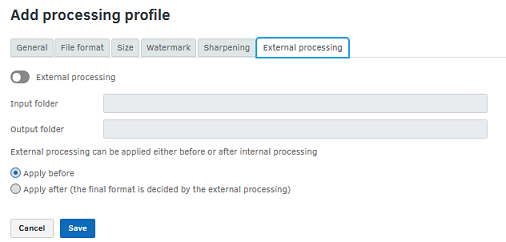
- Open the External processing tab.
- Turn on the External processing toggle to process the files in an external application before delivering them to the client.
- In the Input folder field, enter the location where FotoWeb will deliver the files.
- In the Output folder field, enter the location where the files will be picked up after processing. FotoWeb will use the file name to recognize the output file, so make sure that the external processing engine does not rename the file. (You can change the file's extension due to a file type change, however.)
- Finally, you can choose whether the external processing should be applied before or after FotoWeb applies its processing as set up on the above tabs.
External processing
- Select Save.
Assigning the processing profile or profile set to an archive
After completing the configuration of processing profiles and optionally adding them to a set, you can assign them to an archive.