Creating a marker
What are markers?
Markers are visual indicators you can customize to alert users about files in your collections that meet certain criteria. For example, you can display a marker if a file contains a certain string in a metadata field to alert a user. Markers can be made interactive so that selecting a marker can execute a metadata macro, open a metadata editor, execute a webhook, or navigate to a certain URL. This way you can use markers to control your workflow by simply changing the state of a metadata field to control which stage in the workflow it is at.
Each marker has an access list that controls which groups or users can access it and, optionally, trigger an action if the marker has been made interactive.
Creating a marker
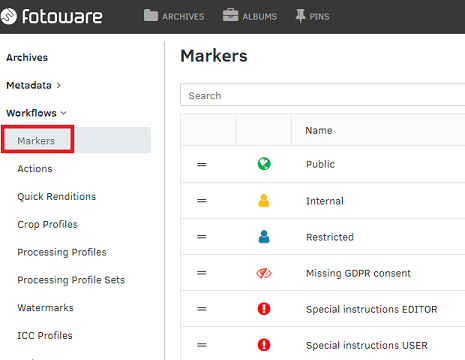
From the Tools menu (cogwheel icon) go to Site Configuration > Workflows > Markers.
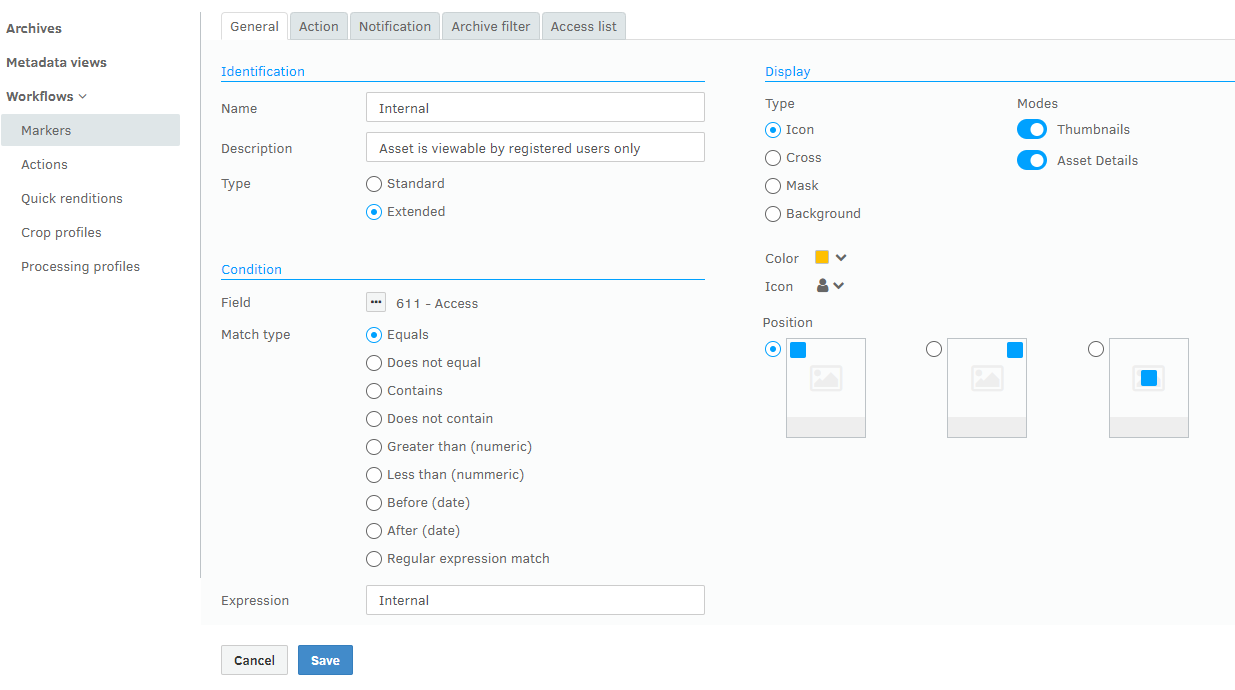
Select the Add marker button to create a new marker. Enter a name and a description in the Name and Description fields. The description text is displayed as a tooltip when you hover over the marker.
Standard vs Extended markers
Two types of markers exist in Fotoware - Standard markers and Extended markers. The differences are outlined in the table below.
Standard markers are available to all registered users - with a Standard, Plus or Pro license
Extended markers are available only to Fotoware Main Users or Fotoware Pro Users, which means that all users in SaaS have access to use both standard and extended markers. A few features are only available to Pro users; this is made clear in the documentation where applicable.
|
Functionality |
Standard markers |
Extended markers |
|---|---|---|
|
Visual indicator to reflect a metadata state |
 |
|
|
Custom marker icon |
|
|
|
Custom marker placement |
 |
|
|
Interactivity when marker is clicked: |
||
|
Metadata editing |
|
|
|
Application of preset metadata macro |
|
|
|
Execution of webhook |
|
|
|
Navigate to preset URL |
|
|
Setting conditions for displaying the marker
Next, you have to set the condition for showing the marker. This is done by selecting a field and entering an expression that must be matched to display the marker. Note that the marker evaluation is carried out on the client side, not on the Fotoware server.
Tip: For help on creating regular expressions, see this Wikipedia article on regular expressions (external link, opens in new tab)
Using dynamic tags in marker conditions
Dynamic tags can be used when setting marker conditions, such as when evaluating greater/smaller than and to add date evaluation.
Example:
To create a marker to be displayed on assets that have Expired, you can use the Expiry Date field (#428) as the basis for the marker.
In the Marker Conditions, choose Before (Date). In the Expression field, enter:
{{now}}
This will translate to the current date and time in ISO format so that all files with an expiry date before the current date and time will be displayed with a marker.
Choosing a marker icon
Finally, choose the marker you would like to appear when the marker condition is met. For standard markers, you can choose an icon and a color. Extended markers offer a greater choice of marker options and setting of the marker's position on the asset's thumbnail.
Note
If users are logged on to Fotoware while the administrator is setting up or modifying markers, they need to log out and back in to display the new markers.