Deployment of FotoStation for Windows
Preparing the FotoStation installation package
Create a distribution point
This must be a shared folder on a server that the clients can access to run the installer. Ensure users who need access to this distribution point have Read privileges on the share.
Download the latest version of FotoStation
It can be downloaded from https://downloads.fotoware.com/FotoStationWindows
Run the setup program with the ‘/a’ startup parameter:
Example: FotoStation-Setup.exe /a
This will unpack the files from the installer to a location you specify, typically the distribution point you created above.
Prepare the 'Logon to server' feature
You can skip this step if you don't have a centralized configuration.
You must modify the locationdata.xml file at <DistributionPoint>\CommonAppData\FotoWare\FotoStation\locationdata.xml to do this.
Note: FotoStation uses the FWP protocol to upload, manage, and download configurations to an Index Manager server. Legacy systems where configurations are stored on a regular server share are still supported. See the Legacy section below for information on how to manage this type of deployment. We strongly recommend deploying the new scheme where configurations are managed on an Index Manager server via FWP.
locationData.xml - contents and legend:
<?xml version="1.0" encoding="utf-8"?>
<FotoWare_Settings>
    <Group name="ConfigLocation">
        <String name="locationType">FwpLogon</String>
        <Int name="showOffline">0</Int>
        <String name="logonPath"></String>
        <String name="serverUrl">IMSERVER</String>
    </Group>
</FotoWare_Settings>
| Property | Possible values | Explanation |
|---|---|---|
| locationType | User, FwpLogon |
User specifies that each FotoStation user has an individual configuration stored in their user profile. In this mode, leave the logonPath and serverUrl properties blank. FwpLogon specifies that FotoStation retrieves its configuration from an Index Manager server via the FWP protocol. This value must be coupled with a valid serverURL value. |
| serverURL | IP address or hostname of the Index Manager server where the configurations are stored |
Examples: 127.0.0.1, IMSERVER, www.mydomain.com |
| showOffline | 0, 1 |
0 means that users cannot choose to work offline and are required to log on to the server 1 means that users can choose the Work Offline option in the login dialog. |
| For an explanation of legacy properties for logon to a configuration folder stored on an SMB share, see below. | ||
Legacy locationData.xml - contents and legend
<?xml version="1.0" encoding="utf-8"?>
<FotoWare_Settings>
    <Group name="ConfigLocation">
        <String name="locationType">Logon</String>
        <Int name="showOffline">0</Int>
        <String name="logonPath">\\MYSERVER\Shared Data\FotoStation Logon</String>
    </Group>
</FotoWare_Settings>
| Property | Possible values | Explanation |
|---|---|---|
| locationType | User, Logon |
User specifies that each FotoStation user has an individual configuration stored in their user profile. In this mode, leave the logonPath and serverUrl properties blank. Logon specifies FotoStation retrieves its configuration from an SMB file share. This property must be coupled with a valid LogonPath value. |
| logonPath |
UNC path to the share with the configurations Windows clients: \\servername\sharename\folder Mac clients: /Volumes/volumename/sharename/folder) Remember that the share has to be mounted for the Mac to find the logon folder. |
If using per-user configurations, leave this property empty. |
| showOffline | 0, 1 |
0 means that users cannot choose to work offline and are required to log on to the server 1 means that users can choose the Work Offline option in the login dialog. |
Edit the FotoWare FotoStation.msi file with an MSI editor
Change the following values in the Property table of the FotoWare FotoStation.msi file:

Set the USE_LOCATION_FILE parameter to 1 to distribute the locationdata.xml file. This way, the FotoStation clients will get their configuration from the location specified in the locationdata file.
Configure licensing
Alternative 1: If you use a single product key with several activations. If you are using a license server, skip this step.
In the Property table in the MSI file, locate the FWLICENSEKEY property and paste your license key there:

Alternative 2: If you are using a license server.
In the Property table in the MSI file, locate the FWLICENSESERVER property and type in your host name preceded by an @ character, like this:@licenseserver. If the license server is configured to use another port, use this format: 2000@licenseserver. (Replace 2000 with whatever port number you have configured in your license file.)
Learn more about activation with a license server.

Save the MSI file before continuing to configure Group Policy
Configuring Group Policy
Note: The following procedure describes the configuration of FotoStation. Although the examples depict FotoWeb Desktop deployment, the steps are identical.
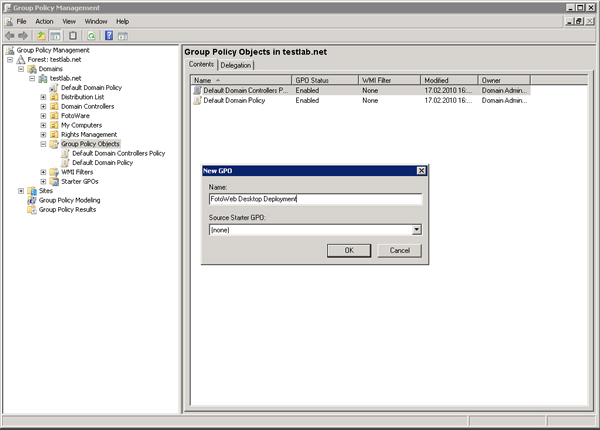
- In Administrative Tools on the server, open the Group Policy Management.
- Right-click Group Policy Objects and select New.
- Enter a name - for example, FotoStation Deployment (as in the example below).
- Decide whether the policy applies to computers or users. In this example, we are using Computer mode.
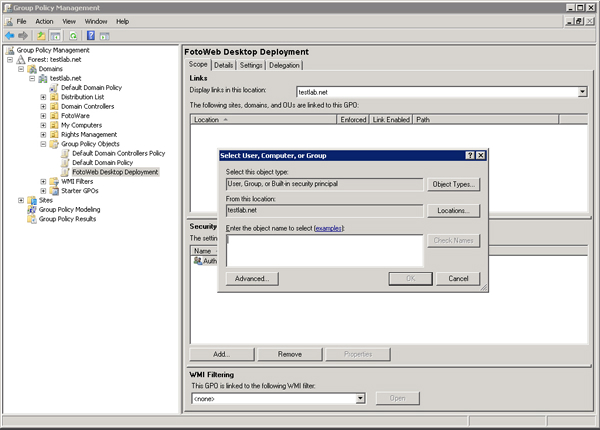
- Select the Group Policy Object you just created. Select Add, Object Types, and then Computers in the bottom right panel. Choose the domain computers to which the package should be distributed.
- Right-click on the GPO you just created and select Edit. The Group Policy Management Editor opens.
- Go to Computer Configuration > Policies > Software Settings.
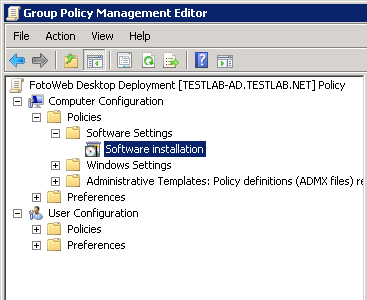
- Right-click on Software installation and select New Package.
- Select the FotoWare FotoStation.msi file from the distribution point (the share where you stored the files expanded from the installer package).
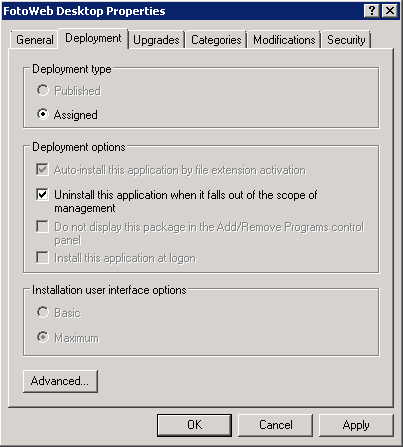
Note: Access the file through its share path (typically \\servername\sharename). - Select Assigned as the Deployment type.
- Highlight the Software installation node and right-click the deployment object you just created. Then select Properties.
- On the Security tab, add the groups/users to be granted permission to install FotoStation (they need read access).
- Open the Deployment tab and select Uninstall this application when it falls out of the scope of management. This way, the software will be uninstalled from computers that are removed from the management scope.
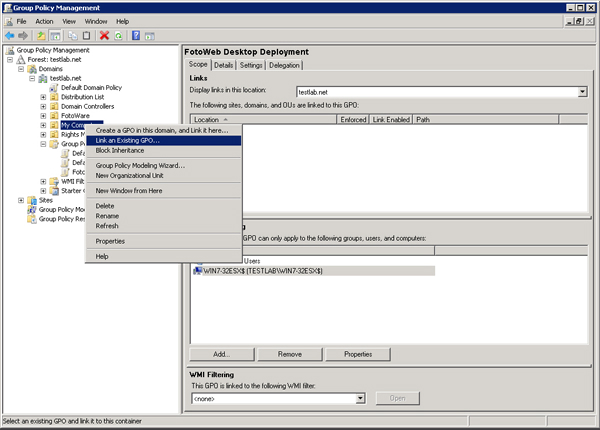
14. Close the Group Policy Management Editor. Now, you can link the Group Policy Object to a group of computers:
- In the Group Policy Management window, right-click the computer or OU to which you want to apply the GPO and choose Link an Existing GPO. Then choose the deployment package you would like to distribute.
- Open the Active Directory Users and Computers program from Administrative tools and move any computers you want to distribute the software package to into this group (drag them from the Computers node into the group you created in Group Policy Management).
15. Force a Group Policy update by running gpupdate on clients. This refreshes local and Active Directory-based Group Policy settings. Usually, it should not require additional options - just run gpupdate from the command prompt.
Command syntax:
gpupdate [/target:{computer|user}][/force][/wait:value][/logoff][/boot]
For more information, see http://technet.microsoft.com/en-us/l.../bb490983.aspx
Note: gpupdate runs automatically approximately every 120 minutes on domain clients. As a result, the software will typically be installed on the next working day when users restart their computers.