Advanced QuickList example: Adding location information using a QuickList
Overview
The default FotoStation metadata schema has a special field, #390, that is of type "bag of struct" - this means that the field has a number of child items that combine to form a struct.
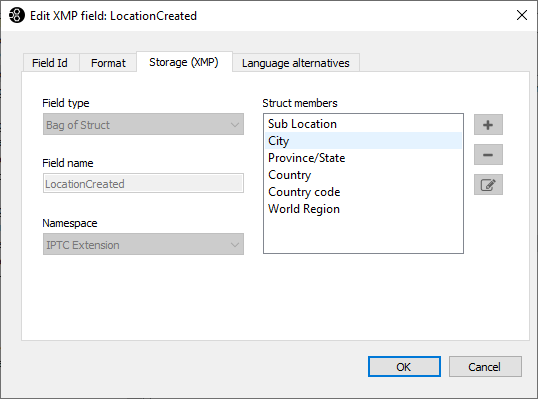
By accessing the metadata configuration, you can see that struct in #390 - Location Created has these struct members:

In the following, we will add this field to a metadata editor and create predefined content using QuickLists to allow users to choose a location from a list, filling in all the child fields. We will also allow the user to edit each child field individually with a unique QuickList per field.
Adding the field to a metadata editor
- Open the metadata editor in FotoStation and press Ctrl-E to edit the layout.
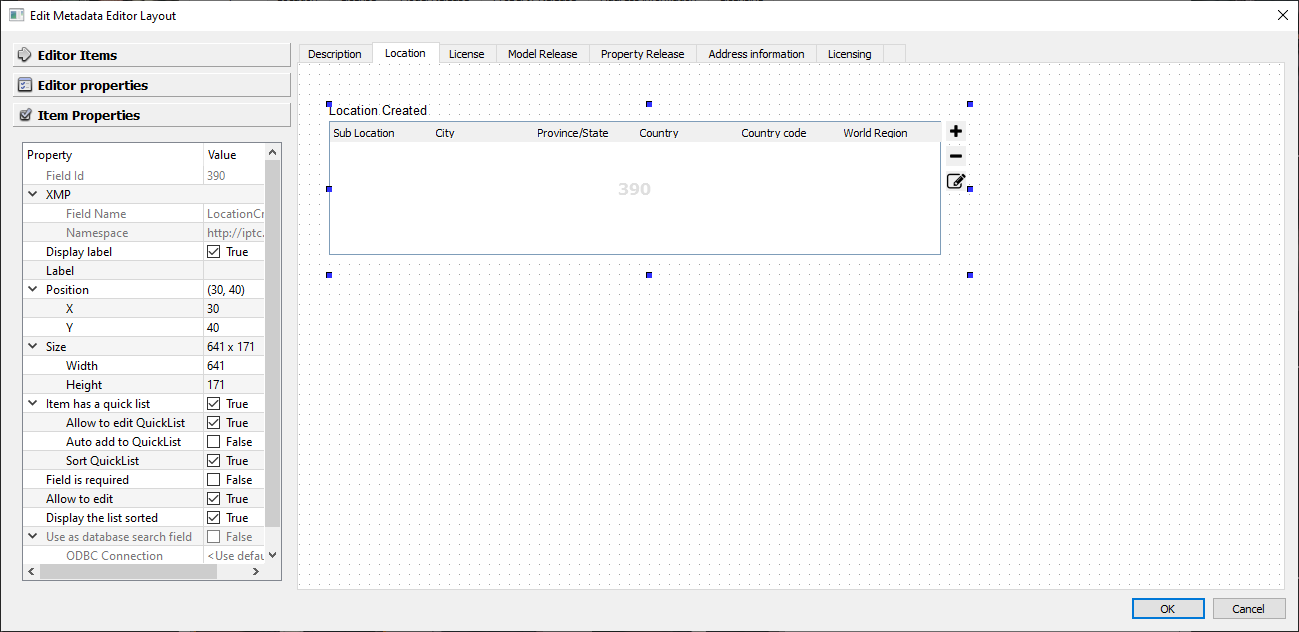
- Create a new tab in the editor and locate field 390. When adding it to the page, you can see that the control that is inserted holds all the child fields in the struct:

- Select the field and choose Item Properties in the side panel.
- Select Item has a quick list.
- Select OK to store and close the editor.
Adding QuickList content to the Location Created field(s)
If the metadata editor is not open, select a file and press Ctrl-T to open it. Then choose File > Manage QuickLists to open the folder where the QuickLists are located.
Create a new text file in this folder called 390.txt. We will add content to this file that will be selectable from the field's QuickList.
390.txt sample content
#! APPLY_SELECTED_ONLY=1
Locations
    USA
        Grand Central Station;New York;New York;United States;USA;North America=Grand Central
        Miami Beach;Miami;Florida;United States;USA;North America=Miami Beach
The initial comment implies that when choosing a location from the list, only the current node is selected; that's because, unlike most cases when using a hierarchical list, we do not want to include parent items when choosing a location - the #! APPLY_SELECTED_ONLY=1 parameter sees to that.
The Locations and USA nodes are examples of how you might structure the content in the list for easier navigation. Each level is separated by a tab indentation in the text file. Though not required, these two levels make it easier for a user to navigate a host of locations.
The actual content that's filled in is what you see in lines 4 and 5 above, where semicolons are used to separate the content that goes into the child fields in the struct.
Grand Central Station -> Sub Location
New York -> City
New York -> Province/State
United States -> Country
USA -> Country Code
North America -> World Region
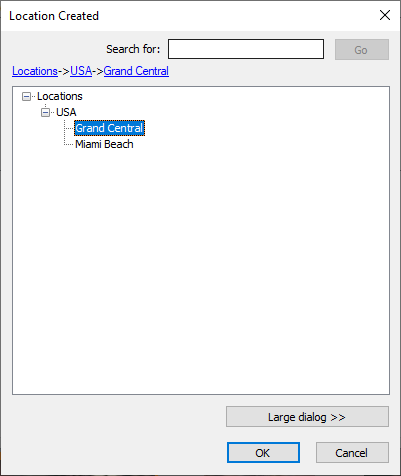
At the end of the line, the =<term> statement defines the alias for the node that the user sees in the user interface:

Select Grand Central to insert all the values defined in the file into the respective child fields in the struct:

Adding separate QuickLists for the individual child fields in the struct
It is also possible to add separate QuickLists for each child member in the struct. This is done by creating flat QuickList files in this format:
ql_<fieldnumber>_<child struct field>
In the example below, the QuickList file is called ql_390_1, which maps it to the first child field in the struct - Sub Location.

The file contains a flat list of entries for the field it is mapped to:
Rockefeller Center
Central Park
Tribeca
Similarly, you can create QuickList files that map to the City field (ql_390_2 - the second field in the struct), the Province/State field (ql_390_3 - third field in the struct), and so on.
To modify these fields, simply click on the field in the record you wish to edit and choose the entry from the drop-down list. You can also start typing and have FotoStation autocomplete the entry based on the list contents.
