Defining source or destination folders on a network server
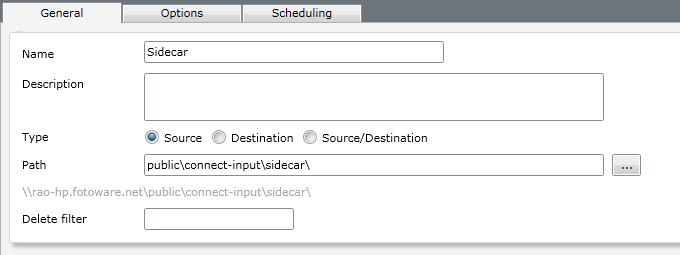
Having configured the network server settings you can specify folders that you want to use as the source or destinations for your channels. To do so, click on the network server you defined and click on the green Plus icon to create a new folder.
Creating and configuring folders for a network server

Name: Type a short descriptive name for the folder here.
Description: Here you can specify more accurately what the folder is for. (Limited to 255 characters)
Type: Choose whether this should be a source or a destination folder, or both. This setting determines which category the folder shows up in when creating a channel.
Path: Type in the path to the folder here. If you do not know the exact path you can click on the Browse button to expand the server's file system and optionally create a folder directly from the web interface.
Delete filter: Lets you specify files to delete from the input to avoid transferring them. This can be used to remove unwanted files from your workflow or to avoid transferring accompanying files that your system doesn't use. Several file types can be defined and separated with a space, thus: *.txt *.tmp
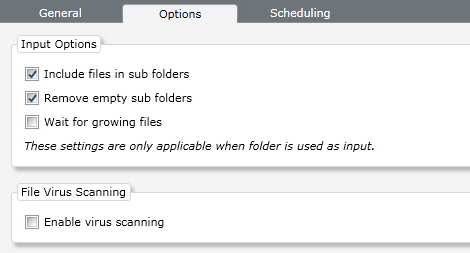
Source Folder Options

These options apply only to source or source/destination folders:
Include files in subfolders: Specifies whether Connect should retrieve all files in subfolders in the specified path.
Remove empty subfolders: Enable this option to have Connect "clean up" empty subfolders after retrieving the files in them.
Wait for growing files: This option can be enabled to make sure Connect only picks up the file in the source folder when is has been written entirely. This may be useful if the source folder is populated by another application that writes files byte-for-byte in the input folder without locking it.
Enable virus scanning: Enable this option to automatically check all incoming files for viruses. Infected files can be deleted, quarantined or ignored and logged. The actual virus scanner settings are configured on the Service Options tab.
