Creating custom Classify views
This topic explains how to create new or modify existing Classify views in FotoStation.
Customizing Classify views
A Classify view is a column view that lets you change the Classify state of files (the content of a particular metadata field) by dragging and dropping them from one column to another. When you move a file from one column to another, FotoStation changes the value of the Classify state field. By assigning labels to the values (ranging from 00 to 31), you can make meaningful classifications to help you sort your files.
FotoStation comes with two Classify views as standard: Basic and Refined. These views can be used just as they are. You can also create your own classify view using your own custom labels, as described below.
Creating a Classify view

Go to Views > Classify views in the configuration tree to display a list of all configured Classify views. Select New to create a new one.
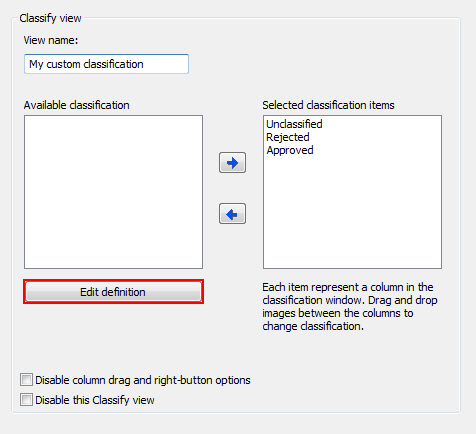
Enter a name in the View name field. Select Edit definition to open a dialog where you can assign labels to the range of values. Although you can create several different Classify views, the labels are global, and you can choose which labels or columns you want to include in each Classify view.
Defining labels

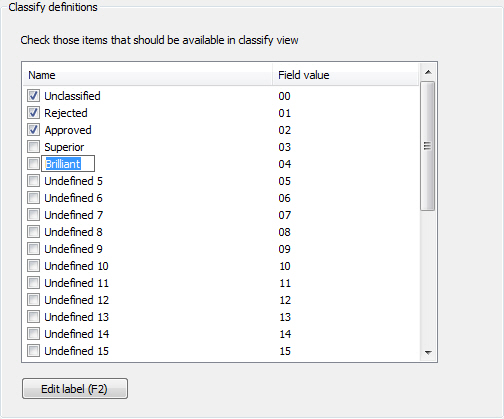
To create a new label, select an undefined field in the list and select Edit label (or press F2). Then enter a label. The label will appear in the column header when using the Classify view. Select the labels you want to enable and select OK to close the dialog. In the above example, an extra classification called Pending has been created and will be added to the Classify view.
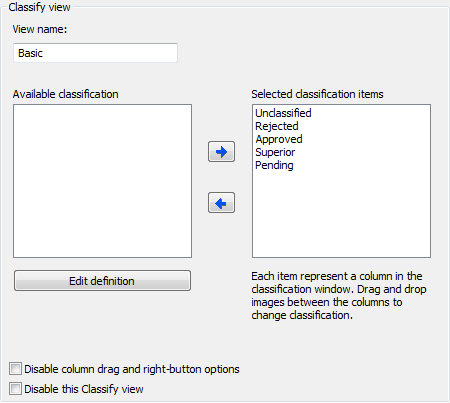
New classes (labels) appear in the Available classification list and can be selected and moved to the Selected classification items list using the blue right-arrow. That way, the classification is included as a separate column in the view. The example below shows the newly created Pending classification included in the view.

Note: Each Classify view can hold a maximum of 10 columns.
To disable the possibility to drag and drop column headers to rearrange the classification columns, select Disable column drag and right-button options. If some classifications are in the Available classification list but have not been added to the Selected classification items list, they will not appear in the column view. However, you can right-click a column header and swap an existing classification with one from Available list, provided that the aforementioned checkbox isn’t selected.
Disabling the Classify view
To disable the classify view, select Disable this Classify view.
