Creating a user
Follow the steps below to manually create a user in FotoWeb. If you would prefer to import users and groups from your existing active directory, see Configuring Authentication Providers and Single Sign-On in FotoWeb.
Adding a user
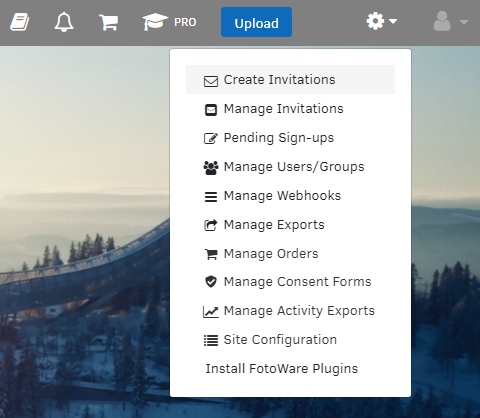
Go to the User Management console: Open the Tools menu (cogwheel icon) and choose Manage Users/Groups. In the view that opens, select Add new user.
Setting basic user properties
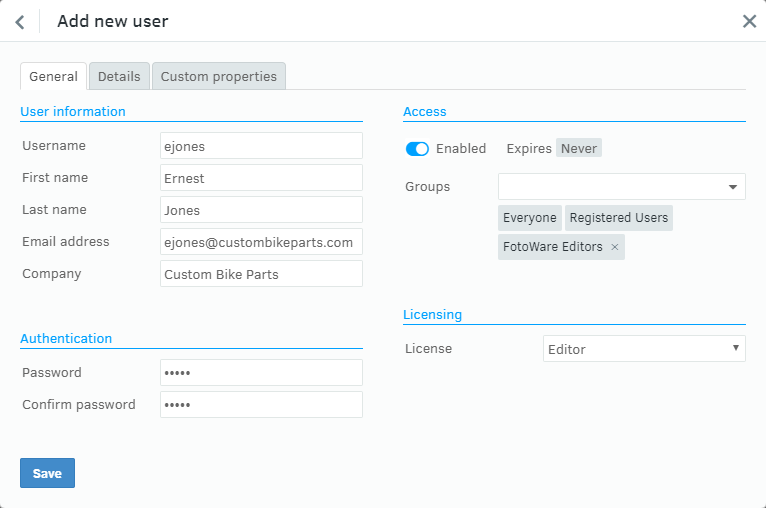
Enter the user information on the General page. The fields Username, First name, Last name, and Email address are mandatory.
Password
Enter the password that the user needs to log in and confirm it.
Note: The site owner, guest users, and SSO users cannot edit passwords or password-related settings because:
-
SSO users and guest users do not have passwords.
-
The site owner must use one of the following options to change their passwords:
- in the Config app.
- by selecting Change password from the user menu while logged in.
- by using password reset.
Note: When modifying the accounts of users imported from an external authentication provider, the password cannot be changed as it is managed in the external directory.
Choice of license
The license controls the features that users have access to in the system.
Adding the user to a group
When creating a user, the user can be immediately assigned to one or more groups by selecting a group from the drop-down list. New groups can also be created by entering a new group name and selecting Add new group in the drop-down. You can set all the necessary group permissions before saving the new user.
Saving the user
Select OK to create the user and store it in the FotoWeb user database.