Defining crop sizes for FotoWeb Desktop checkout
How to create preset crop sizes that users can choose from when they check out a file for cropping using FotoWeb Desktop.
About crop profile sets
The crop profile sets are used with FotoWeb Desktop. FotoWeb users can be granted permissions to crop images in the archives. To assist users in this process or to enforce company standards, you can create crop profile sets that can be linked to the archives.
These crop profile sets are basically collections of pre-defined crop settings. Once a crop profile set is created, the archives can be configured to use this set. The Crop Profile Sets node on the Workflows tab displays list of all crop profile sets available on the site.
How the checkout works
When a user invokes the crop menu in the web interface, FotoWeb generates a FotoWeb Desktop command file that contains crop instructions for that archive. FotoWeb Desktop that is required on the client side reads the command file and displays the crop dialog to the client. This dialog will display all the pre-defined crop settings from the crop profile set that is linked to the archive. The user can choose one of these pre-defined settings to perform a crop.
Since this is an optional feature, the archives can simply disable this feature. The crop profile sets shipped with the installer are located in the C:\Programdata\Fotoware\FotoWeb\Server Settings\Crop Profile Sets folder under the FotoWeb installation folder, while the crop profile sets for the site are located in the Crop Profile Sets folder under the site folder.
Creating and configuring a crop profile set

Open the site configuration (Tools | Manage site), expand the Workflows tab and select the Crop profiles node.
Now click on the Add crop profile set button to create a new set.
Start by naming the crop profile set and optionally entering a description. Then you will need to define the crop sizes that go with the set. Click on Add to add a crop size.
Crop profile settings

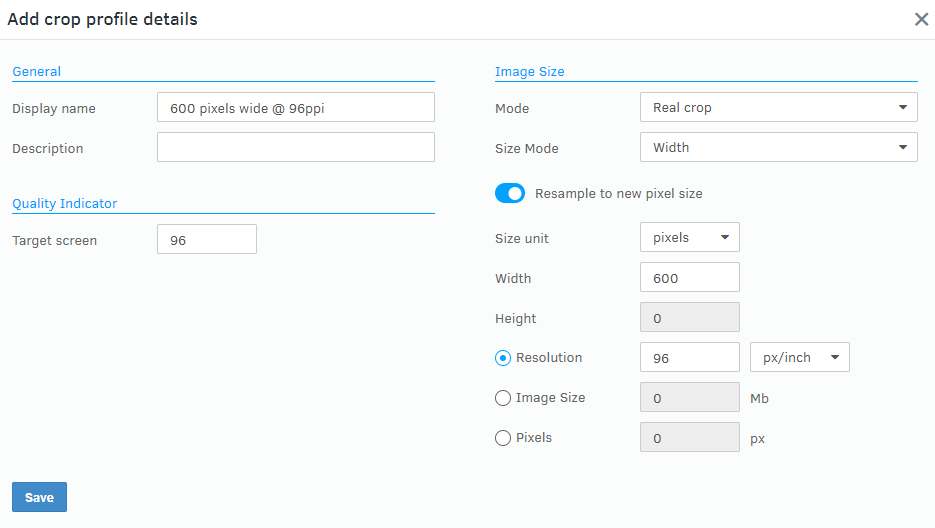
Start by naming and describing the crop size. Then choose a crop mode. The remaining options in the dialog will automatically be enabled according to the selection you make.
A soft crop will only apply a crop frame to the image without altering the actual image data. This crop info can be used by Color Factory to perform a real crop in a processing channel. A soft crop only lets you choose a size mode while all other options are grayed out.
Choose a size mode and set the measures.
When you choose Real Crop you also have the possibility to perform resampling of the image to a new pixel size. You may then also change the resolution, image size and pixel size of the image. Notice the Target Screen setting, which is the basis of all quality calculations. You should set the target screen according to what the cropped image will be used for. The target screen is the printing raster screen used when printing on paper. The quality value is image resolution/target screen. A value of 2 is normal. This value is only relevant for printing.
When you've made a crop profile of preset sizes, you'll want to assign that profile to an archive.
