Defining source or destination folders on the local server
Choosing source and destination folders on the local server
After you have configured the local server settings, you can specify folders that you want to use as the source or destinations for your channels.
- In Connect Settings, go to Servers > Default > Local Server.
- Open the Folders tab and select +Add folder.
- Double-click the new folder that appears.
General properties
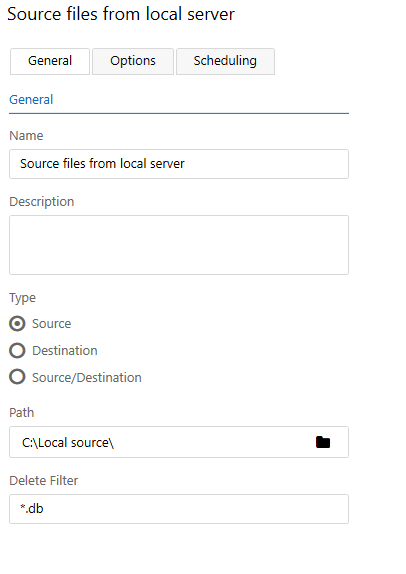
- Enter the following information, as necessary.
Name: Enter a short descriptive name for the folder.
Description: Enter a more detailed description, if necessary (255 character limit).
Type: Select Source, Destination, or Source/Destination. This setting determines which category the folder appears in when creating a channel.
Path: Enter the path to the local folder. If you do not know the exact path you can select Browse to expand the server's file system and optionally create a folder directly from the web interface. Note: The path must always start with a leading forward slash, for example, /files.
Delete filter: Here you can specify files to delete from the input to avoid transferring them. This can be used to remove unwanted files from your workflow or to avoid transferring accompanying files that your system doesn't use. Several file types can be defined and separated with a space, for example, *.txt *.tmp
- Open the Options tab. The Options tab is only available for source folders or source/destination folders.
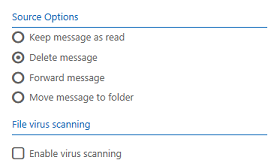
- Configure the following as required:
Keep message as read: Select this to leave the message on the server, but mark it as read to prevent it from being processed again.
Delete message: Select this to delete the message from the server.
Forward message: Select this to ensure to forward the message to another email address.
Move message to folder: Select this to move the message to another folder.
Enable virus scanning: Enable this option to automatically check all incoming files for viruses. Infected files can be deleted, quarantined, or ignored and logged. The virus scanning settings are configured on the Service Options tab, for more information, see Scanning transferred files for viruses scanner settings are configured on the Service Options tab.
- Open the Scheduling tab. Scheduling controls when Connect pulls files from a source folder.
Scan frequency: This setting determines how often Connect scans the input folder for new files. Select Continuously for Connect to scan the folder several times per minute or select With Time Interval to manually set the number of seconds between each scan.
Run Schedule: Select and/or drag to set a run schedule based on the time of the day and the day of the week. White dots in the grid indicate when the folder is active and blue dots indicate when there is no scanning of the folder.
- Select Save.
What's next?
When you have created your source and destination folders, you can now combine sources and destinations in a channel, if required.