Configuring transfers to or from an email server
Connect can use email servers both as source and destination. With an email source, Connect strips the email attachments from the message and processes the attachments through a channel. With email servers used as a destination, Connect sends each file processed in a channel to an SMTP server as an attachment to a number of email addresses. You can also define a custom email subject and message body.
You can use Connect to access a Microsoft 365 account using IMAP with OAuth or Microsoft Graph. However, you can only receive emails from Microsoft Outlook and not send or forward emails. For more information, see Configuring transfers from Microsoft 365 .
Creating a mail server connection
- In the Connect Settings app, go to Servers.
- Select the group to which you want to add the server and select Add server. You must specify some general settings for the server before defining the folders you want to use for file transfers.
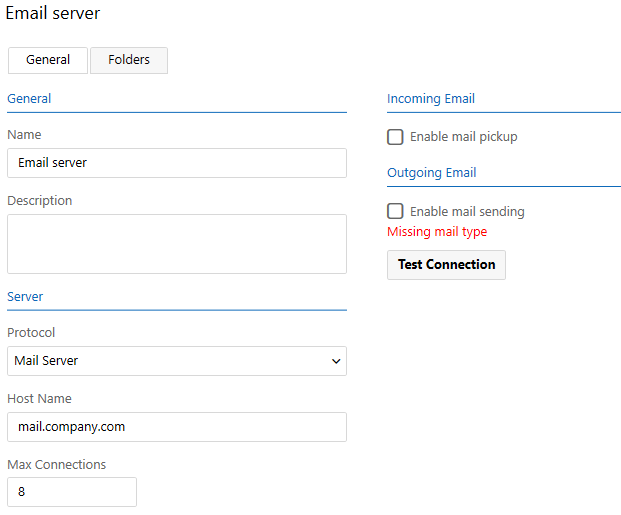
- Enter the following information as necessary.
Name: Enter a short descriptive name for the mail server.
Description: Enter a more detailed description, if necessary (255 character limit).
Protocol: Select Mail Server from the drop-down list.
Hosting provider: Select Custom server from the drop-down list.
To use Microsoft as the hosting provider, see Configuring transfers from Microsoft 365.
Host Name: Enter the mail server's host name or IP address here.
Max Connections: Specify the maximum number of connections Connect may open to the mail server simultaneously.
-
Select Enable mail pickup for Connect to use the mail server as a source for a channel (i.e., to retrieve emails and attachments from the server). You must also select which protocol to use (POP or IMAP) and, optionally, choose whether the email server is configured to communicate on a secure connection. The port number will change according to your choice, or you can set the port number manually if your server uses a non-standard port.
- Select Enable mail sending if this email server will be used for mail delivery of files (i.e., as a destination). Choose the port number and, optionally, if the server uses a secure connection. If the outgoing mail server requires authentication, select Requires authentication and set the account information when you proceed to create the distribution lists in the next step.
- Select Save.